ProjectPlanningBuildingsGrounds: Difference between revisions
m 30 revisions |
|
(No difference)
| |
Latest revision as of 17:36, 16 January 2016
Buildings and Grounds
2012
2011
2010
Foreman: Steve
Infrastructure: Hooch
Stuff we need to acquire:
1 Large Picnic Table
Shop extension:
- Workbenches
- Curtain
Gray Water:
- Replacement sump pump, typ 12V marine bildge
- Backup power supply for sump pump, ie. computer power supply
- Or maybe we go 120V?
1 Grill for the kitchen
2009
Pod Leader: Steve
Layout: Bethany
2009 - Dome
Info from 2007 and eariler
HOW TO SETUP STRUCTURES
Quonset Huts
There are two Quonset huts that we will be erecting. These provide both the main, common area shade for the camp, and the shelter for the kitchen. The longer, main area, Quonset hut is set up first, then, after the long house is completely erected; the kitchen can be set up to join it at a 90-degree angle (typically near the center, forming a covered T-shaped intersection). This illustrated guide to setting up these structures should give you an idea of what it takes and how to do it if you never have before. This documentation is most definitely a work in progress, so please send any corrections/improvements to d_ruuska (at)hotmail {dot}com. At the end of this document are several appendices, such as resources, part numbers of consumables and a list of needed tools. Now hurry up, red and comprehend this so that you can get back to work. The sooner to be able to have PHUN!!!
Step 1 Footprint Layout:
Lay out the footprint of the Larger Quonset on the site. Use nails or flags to delineate the corners and check the dimensions by pulling both diagonals. Adjust accordingly until the layout is square. The width of the large, (40-foot long rib), structures is 30-feet. For example, a 60-foot long Quonset the diagonal would then be sqrt(w^2+l^2). sqrt((30*30)+(60*60))=67-feet-1-inch. The kitchen hut is easy, since it is a multiple of a 3-4-triangle, 30-feet by 40-feet, so the diagonal for the kitchen is 50-feet.
100' or 200' measuring tape
Step 2 Re-Bar Layout:
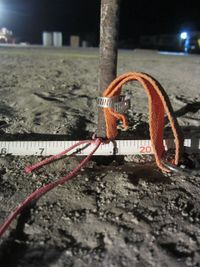
Layout the re-bar. Pull a 100 or 200-foot measuring tape down each side where the ribs will reach the ground. At every 4-foot mark place a 4-foot long re-bar with a D-ring and orange strap hose-clamped to it. Do the same for the other side. For a 60-foot long Quonset, there will be 13-pieces of re-bar per side, 9-pieces per side for a 40-foot long structure.
100' or 200' measuring tape
Step 3 Driving In the Re-Bar:
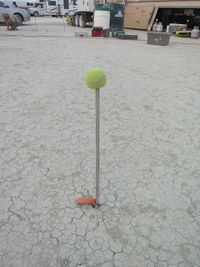
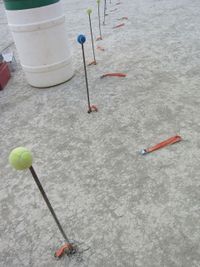
Drive in the re-bar with the impact hammer. Make sure that the impact hammer is set on the impact only setting, not the rotary, or rotary/impact setting. There are two possible orientations for the re-bar, only one of which is correct. There is an orange strap hose-clamped to the re-bar about half-way up, on this there is a D-ring. What you want here is the loop, or bight, of the strap to be coming straight out of the upper side of the hose clamp. If it comes out of the bottom, then it is likely to get cut by the hose-clamp if it is under any stress or wind-loading. Drive each piece of re-bar in until the hose-clamp is at Playa level. Before you move on to the next piece of re-bar, make sure to cap the one just driven in with a tennis ball, PVC T-cover or one of the commercial orange re-bar caps so that no-one gets skewered inadvertently.
Step 4 Laying Out the PVC Framework:
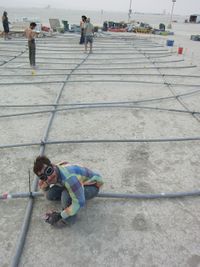
While steps 1 & 2 are being done, sort the PVC into sizes. The PVC is not buried very deeply in the 20-foot container so we should be able to just pull it all out as we use it since this will be on the the very first things done after making sure that we have our personal tents up. The ones that we use for the Quonsets are 1-1/2" and 2" grey PVC. We tend to do this layout and assembly outside the footprint of the Quonset and off to one side away from the re-bar sticking up out of the ground at that side.
First off, place the 3 spines on the ground. The center one is made of 2" grey PVC and the other two are made of 1-1/2" grey PVC. We want 5-feet of overhang on each end for these, so if the Quonset is 60-feet long, then use seven, 10-foot long pieces of PVC. The direction of the spines, as determined by the end that the bell couplings are on, should alternate with the lower spines going in one direction and the upper spine oriented the opposite way. pic/diagram These have been used many times and tend to be curved. Lay them out as straight as you can, i.e. use the straightest ones for the spines. In order to assure a good fit, we may have to 'persuade' some of the ends to go into their corresponding sockets all of the way by use of the sledge-hammer and a piece of wood or HDPE to avoid breaking the ends of the PVC. The wood tends to break and get all splintery, so for next year I will make some HDPE pieces that we can use instead.
Next the ribs are laid over the spines. The end ribs take the most abuse, so they are made of 2-inch grey PVC. All of the other ribs are of the 1-1/2" PVC. One thing to keep in mind is that the ribs should alternate in direction. pic/sketch What this means is that the sockets on the one end of each piece of PVC should face one side on the first rib, the other side on the next rib and alternate all the way down the structure. This ensures that, in the event of high wind from one direction, that even if some of the ribs come apart, not all of them will.
?? supplies needed: sledgehammer; HDPE pieces; another 'lipstick-end wedge'
Step 5 Attaching the Ribs to the Spines:
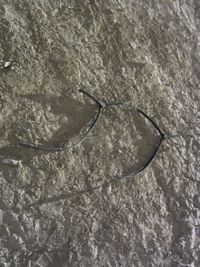
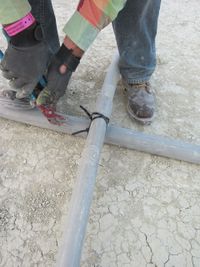
For the long Quonset, the lower spines are spaced 8-feet up off of the ends of the ribs with the top, 2-inch one being placed in the center of the ribs. pic/diagram For the shorter, Kitchen Quonset, these markings are at 10-feet, effectively where the first joint is. This difference is due to the differing sizes of tarps that we have. The ribs all need to be marked at 8-feet from the ends with a Sharpie so that the spines will be located correctly for the size of the tarps. The spines are marked every 4-feet to show where the ribs attach. NOTE, for both structures, the spines need to have these 4-foot marking begin 5-feet from the end of each spine. pic/diagram Once marked, we can begin to bind the ribs and the spines together. For this purpose we use Heavy-Duty, black, 14-inch long Ty-Raps,
(Zip-ties), two per joint in a cross fashion. We use the Ty-Rap 'gun' to tighten them down, but don't pull too tight or you risk putting them under undue stress. Try to leave the tail parallel to the ribs or spine so that they do not poke up into the tarps. DO NOT cut off the ends! There are 2 reasons for this, the sharp ends can cut you and/or the tarps, and it minimizes potential MOOP.
?? supplies needed: ty-rap gun; Heavy-Duty black 14-inch long Ty-Raps (Zip-ties), two per joint
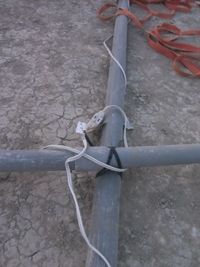
Step 6 Attaching Extension Cords:
To save time and climbing of ladders later, it is good to take the white extension cords and wrap them around the top, main spine of the long Quonset hut before erection. First choose the rib that they will go up and start wrapping there. When you reach the top, center spine, you can continue to wrap the extension cords in both directions towards the ends of the Quonset. You do not need to ty-rap these, instead you can wrap them around the rib and spine in a loose spiral.
?? supplies needed: Short, white extension cords w/multiple outlets
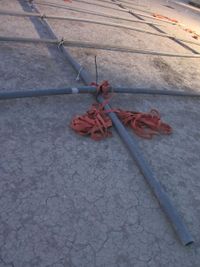
Step 7 Attaching the Center Spine Tie Down Webbing:
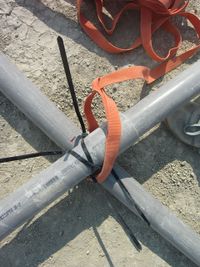
Again to save time and ladder use, you can pre-attach the internal hold-down straps to the frame. Each of these straps has a loop on one end and this loop can be used to attach the strap to the frame. Start at one end of the Quonset and attach 2 straps to the end by wrapping the loose end around the cross joint formed by the middle spine and the outermost rib and feeding the loose end through the loop and pulling tight. Be sure to alternate the direction that you cross the joint with each one. For the long Quonset, there will be 8 of these internal tie downs. They will be tied into 4 places along the spine and there will be 5 corresponding anchor points on the Playa. For the kitchen, repeat this process at the center rib and the far end. there will be 6 of these internal tie downs. They will be tied into 3 places along the spine and there will be 4 corresponding anchor points on the Playa.
?? supplies needed: whatever straps these are (how to tell which?)
Step 8 Putting in the Re-Bar for the Center Floor Tie Down Points:
On the long Quonset, you will need 5 tie-down points for the 8 straps that you have just put on. These are specially-shaped rebar stakes to be added along the center of your existing rebar grid. Drive one into the ground at each end along the center line of the Quonset and 12-16-feet out from the last rib, and 3 inside the 60-foot long Quonset, again along the center line of the top spine and 1/4 & ½ & 3/4 of the way along the length of the Quonset. Drive these in and you will be ready for tying the center straps down immediately after you zipper the structure up in place.
There are 6 tie-downs to attach to the kitchen Quonset PVC; 2 at either end, and 2 from the central rib/spine intersection. There will be 4 tie-down points
New for 2013 will be special stakes with HDPE tops designed for the straps.
?? supplies needed: special HDPE topped or candy-cane rebar *(4)
Step 9 Laying out the Tarps:
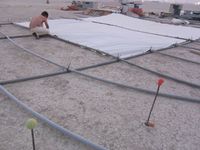
For the long Quonset, we use tarps that are either 8 or 20 feet along the direction of the ribs and some multiple of 4 feet along the spine. We will leave a gap in the lower tarps on the side that the kitchen is on to accommodate traffic between the two.
For the kitchen Quonset, we use tarps that are either 10 or 20 feet along the direction of the ribs and some multiple of 4 feet along the spine.
In the reference Addenda at the end you will find a map of how the tarps were laid out in the past, along with a tarp inventory.
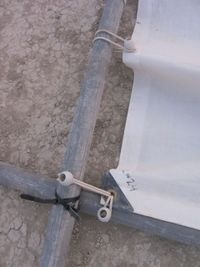
Start at one end of the spine/rib skeleton and place the tarps out according to the map and on top of the PVC. The tarps should not overlap, some space between the tarp and the PVC is OK. If the gaps are excessive, we will want to either adjust the ribs, or daisy-chin ball bungees together to span the distance. It does not matter which side of the tarp is facing in or out.
Step 10 Attaching the Tarps:
The tarps get stretched out on the frame and attached to the ribs and spines by means of ball bungees that pass though grommets on the tarps, go around the PVC frame members and attach around the balls of the bungees. In order to save time on the ground, you can leave the lower 4-6 feet of the tarps unattached. They can be put on once the structure is erected. This also makes it easier to set up as people can pass through the wall as needed and see what is going on during the erection process.
?? methods of tying & wrapping bungees: ask a veteran
?? supplies needed: more/newer bungees? many got tossed in 2012.
Step 11 Laying Out and Running the Over Webbing & the Ground Webbing:
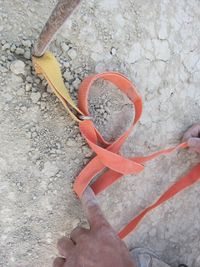
While the overstraps go on after the Quonset structure has been raised, this step prepares them before the raising so that there is no delay in getting the straps over the structure once it is up and in place.
The over the tarp tie-downs are attached at either side to horizontal straps that run through the small D-rings that are attached to each piece of re-bar that the ribs go over. These over the top straps serve a 2-fold purpose, they minimize the flapping of the tarps in higher wind, thus slowing down the rate of ball bungee failure and tarp flying away-ness, and they prevent really strong winds from getting underneath the structure and lifting it up off of the re-bar that constrains it to the ground.
There are two components to the tie-down webbing; a short loop with a cam lock and a much longer, >40-foot, piece with a loop in one end. On one side of the Quonset place the small loop with cam between each rib and on the other side place a long strap between each rib.
Next, at one end one side wall, wrap the loop end of a long strap around the outermost rib, pass the long end through the loop and pull tight. Now, taking the other end of the long strap, first pass it through the loop of the long strap that you previously had place in between the first two ribs. Then pass it through the D-ring that is attached to the re-bar at the next rib. Continue doing this all along the side, alternately passing the end of the horizontal strap through the loops of the loose, long straps and the loops attached to the re-bar.
On the other side of the Quonset hut, this process is repeated. The only difference is that between each rib there will be a short loop with a cam-lock attached instead of the long strap with a loop. Pass through like the pother side until either you have reached the other end, or the strap has run out.
If the horizontal strap is too short, first, take another of the long straps and attach it to the last rib on that side that you are working on in the same way that you attached the first strap. Then, feed it alternately through the loops on the long over-straps and the D-rings on the re-bar until the end reaches the end of the first strap. Loop two of the cam-lock straps together and then feed the loose ends of each long strap through one of them and pull them tight.
Step 12 Getting the 2x4 Braces, Re-Bar and Lashing Ready:
The 2x4 bracing help to prevent the collapse of the structure under high winds. A secondary effect is that it also helps to minimize lift-up of the structure. For a 60-foot long structure, there will ideally e 6 of these 2x4 braces per side. Starting at one end, drop a 2x4 brace and a candy-cane re-bar on both sides every 3-ribs, or a 12-foot spacing. The lashing is the green or black para-cord that we use for everything and should be cut to about 6-foot lengths, one for each brace. These will all be put into place after the structure is up, right now we are just getting everything into place to minimize time between getting it up and final securing. The shorter this time-span is, the less likely that a strong wind can come up and thwart us.
Step 13 Clearing the Area and Gathering People for the Raising:
Move all extraneous crap out of the way so that no-one will be tripping over it. Gather all camp-mates together and send a few runners to the rest of the Hive and to the Esplanade to shang-hai folks into a 10-minute structure erecting phase.
Step 14 Raising the Damn Thing:
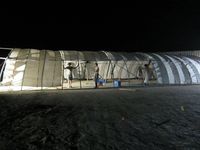
Aaaah, at last, the BIG event. Grab EVERYBODY, and, once marshaled into place and having explained to them what is about to happen, it should not take more than 10-minutes to raise and minimally secure into place. So, this is how we do it.
Gather everyone around and explain what is about to happen and assign specific roles to a few experienced hands. There are three phases to this operation; first informing everyone of what to do and how to do it, second, getting everyone into the proper places, picking up the structure and moving it into place, and last, zippering the structure's ribs onto the re-bar stakes.
- A) Gathering & Explaining:
- Send folks to ask at other camps in the Hive, and especially of any neighbors that we have helped out. Also, pull folks in from off of the Esplanade to help. After all, Burning Man is supposed to be about COMMUNITY. Have whoever is in charge/knows how this is done, preferably someone able to project and who can do this succinctly, explain what we are trying to accomplish, and what the different jobs are. Most people will be on one side or the other, at least one person to each rib. In addition, there will be at least 3 people in the center, underneath the structure while it is being raised who will help to lift the center by means of notched 2x4s applied to the center spine. For a 60-foot Quonset, you will ideally need 40 people to lift it into place.
- B) Moving Into Place:
- First, have a couple of folks go down the re-bar lines with buckets and remove all of the safety caps. Then, with the three central pole support holders off to one side, and at least one person on each rib, it is time to get this thing up. Have everyone pick up the structure and walk it over to the two lines of re-bar. Have the first group stop at the far line of re-bar. Send in the central pole raisers and have the second group bring their ends to the second line of re-bar. This will cause the ribs to arch upwards, supported by the central pole raisers, and the ends to get closer to vertical.
- C) Putting it Down:
- Starting at one end, have 2 people on each of the first 2-3 rib ends on both sides and have them place the rib end over the re-bar and slide it on down. Leave one person behind to hold the rib in place and prevent it from popping back off of the re-bar. The extra person can leap-frog to the next rib that does not have a helper and continue on down the line until all of the ribs are placed on their respective re-bars. This is called zippering it up. You are now done with this phase and can heartily thank and dismiss your extra helpers, however, you still have a bit to do before we are out of the water and the structure is safely secured.
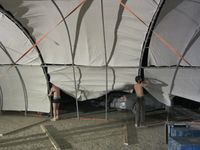
Step 15 Attach the Rest of the Tarp Bottoms:
Now that the structure is up and the ribs are all attached to the re-bar, the hard part is over. All of your gang-pressed extra hands are free to go along on their merry little ways, but you, my friend, still have a bit of work to do before we are actually secure. First off, secure the lower edges of the tarps to the ribs with the ball bungees as before. Also check the ones already put in place to see if any of them have come undone during the raising of the roof.
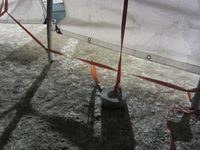
Step 16 Throw the Webbing over the Tarps and Attach:
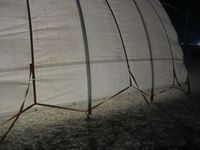
The long end of the webbing, the one without the loop is ready to be tossed over the top of the Quonset to your comrade on the other side. It helps to tie something like a roll of duct tape to the end that you are throwing so that its weight will help propel the webbing over the arch in the manner that you intend. Make sure that there is someone on the other end to receive your tossed gift and to ensure that no-one on the other side will be beaned on the noggin by your surprise missile. Yell timber or some such rot, wait a second or two to ensure that you have been heard, then toss away! Your partner then takes the loose end, untwists it a bit, but a few twists left in tend to make it so that it will not hum and vibrate in resonance with the wind, puts it through the cam-lock and tugs it snug. It does not need to be Super Man tight, a little play is actually good, just snug should do. Take the loose end, which is rather long and tie it up in some manner so that it is neat and not a tripping hazard. I have a particular way that I like to do this and am quite happy to show you how if interested.
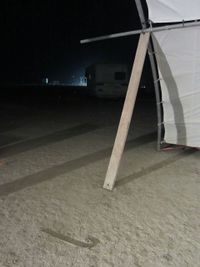
Step 17 2x4 Brace Installation:
Pick up a 2x4 brace and take a good look at it. On one end there will be a notch with a hole drilled just beneath it, this is the top of the brace and will bear against the rib just beneath the first spine. The other end is the bottom and it has a hole drilled through it at an angle. This is for the candy-cane re-bar to go through that will pin the brace, and consequently the structure, to the ground. This hole is drilled through the brace at an angle. The correct orientation is for the axis of the hole to be more-or-less vertical. If it is more-or-less horizontal, just spin it 180-degrees around the long axis of the brace to make it more-or-less vertical. Take your ~6-foot length of para-cord and pass one end through the hole in the brace and then wrap it around the joint between the PVC rib and spine joint that the brace is just beneath. Pass the end of the para-cord through the hole several times and around the joint as many times as you can and then tie the ends of the para-cord off. Repeat this for all of the braces.
When this tying off is done, go back to the beginning, and using the hammer-drill, drive in the re-bar through the hole in the bottom of the brace and secure it to the ground.
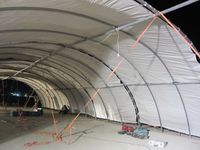
Step 18 Center Tie Downs:
Once all of this is done, take the center tie-down straps that you attached in Step 7 and tie them off to the re-bar tie-offs that you places in step 8. These do not have to be Super Man tight, in fact, a little play serves these straps well. Once they are all in, tie off the loose ends to keep them out of the way.
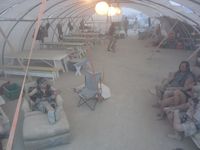
Step 19 Move In, Light and Decorate:
Exactly.
___________________________________________________________________________________
Reference Addenda:
Specs on Schedule 40 Grey, rigid PVC, non-metallic, belled conduit:
http://www.alliedeg.us/DB/PDF1/atc_1718_pvc_cat.pdf 1-1/2” mimimum ID: 1.610” OD: 1.900” 2” minimum ID: 2.067” OD: 2.375”
Ty-Raps used are typically bought from MSC and are #04874798 120Lb. Black, 14-inches long (100/Pkg.) ~$23/Pkg.
Tools Needed:
100' or 200' measuring tape Ty-Raps Ty-Rap Guns or pliers Re-bar caps Impact hammer Knife Duct tape, or other weight for throwing Para-cord for lashing 2x4 races to PVC White extension cords